How To Fix Windows Update Service Not Running will be discussed in this article. The program that updates Windows 10 and other Microsoft software on your computer is called Windows Update. Sadly, it has a troubled past, with update problems being a frequent occurrence. However, on rare occasions, a number of issues, such misconfigured or conflicting settings, may also make it impossible for it to operate at all on your machine.
How To Fix Windows Update Service Not Running
In this article, you can know about Fix Windows Update Service Not Running here are the details below;
If you continue to receive errors stating that your computer’s Windows Update service (or a related service) is not working, the following list of remedies should help you get it back up and running.
Run windows Update Troubleshooter
A built-in troubleshooter in Windows 10 may automatically identify and fix problems with Windows Update. Prior to addressing the remaining fixes, you need to run it. Also check Sites Like Googpt
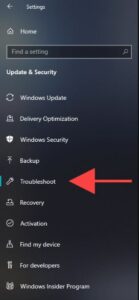
- Choose Settings from the Start menu.

- Choose Security & Update.

- From the sidebar, choose Troubleshoot.
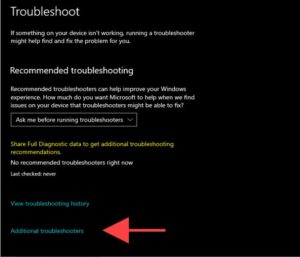
- Click on the “Additional troubleshooters” option.
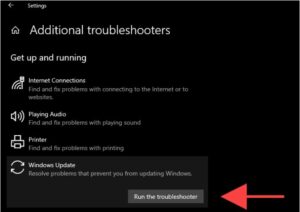
- Pick Windows Update and then click on Run the Troubleshooter.
Restart computer
In addition to clearing the system memory, restarting your computer can assist resolve sporadic Windows 10 service-related problems. Thus, if you haven’t already, give it a shot right now. Then, manually launch Windows Update by selecting Settings > Update & Security > Check for updates from the Start menu.
Re-Configure the Windows Update Service
You need to verify whether Windows Update is configured to run automatically in Windows 10 if it is still not running. The settings for any further connected services also need to be double-checked.
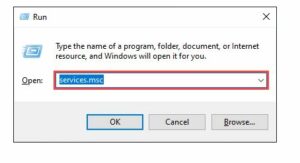
- To bring up the Run box, press Windows + R.
- Click OK after typing services.msc.
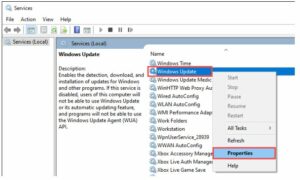
- Choose Properties by right-clicking on Windows Update.
- Choose Apply after setting the Startup type to Automatic. Next, make sure that the service status is set to Running.
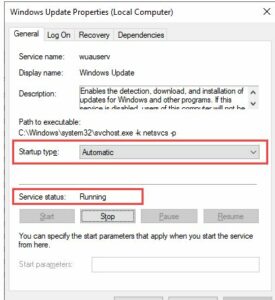
- To save the modifications, click OK.
- For the following services, repeat steps 3–5:
- Background Intelligent Transfer Services
- Cryptographic Services
- Give your PC a restart.
Check for computer Viruses
Another factor preventing Windows 10’s Windows Update service from operating is malicious software.
You should be able to identify and get rid of malware by using the integrated Windows Security applet. However, Windows Update might not have the most recent antimalware definitions to carry out a thorough scan of your computer because it isn’t operating.
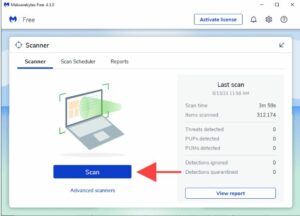
Therefore, using a specialized third-party malware remover like Malwarebytes is the best approach to handle that. Try doing a quick scan and then check the entire system for malware after that.
Disable Third-Party Antimalware Service
It is possible, however, for a third-party firewall or anti-malware program to prevent Windows Update.
Try suspending any antivirus applications using the Windows 10 system tray to rule that out. Next, perform a manual Windows Update.

Reset Windows Update
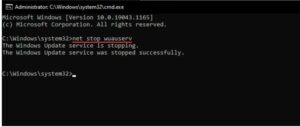
Data downloaded by Windows Update is temporarily stored in a folder called SoftwareDistribution. Erroneous or corrupt update caches may be ruled out as the source of the problem by deleting it. Nevertheless, you have to stop the Windows Update service first (assuming it is still operating and hasn’t crashed). Also check Apps like GoodNotes
- To bring up the Run box, press Windows + R.
- To extend the Command Prompt with organizational rights, type cmd and hit Ctrl + Shift + Enter.
- Execute the subsequent instructions to turn off the Windows Update service:
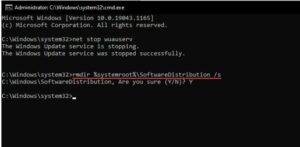
- To remove the SoftwareDistribution and catroot2 folders, execute the following two commands:
rmdir \SoftwareDistribution /s %systemroot%
You have to hit Y > Enter to validate what you just did.
- To restart Windows Update, execute the following command:
start wuauserv on net
Try manually resetting every Windows Update-related component if the aforementioned methods weren’t successful. For further instructions, we advise consulting the applicable Microsoft support article.
Temporary Delete Files
Restarting your computer’s Windows Update service may also be aided by removing data from earlier operating system updates.
- Choose Settings from the Start menu.
- Choose the System.
- From the sidebar, choose Storage.
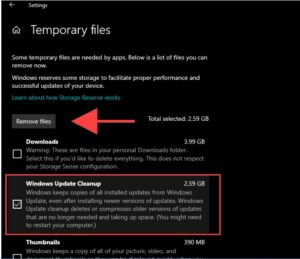
- Select the “Temporary files” option.

- Select the Windows Update Cleanup check box.
- Click on Delete Files.
Run SFC Scan and DISM Tool
With Windows 10, you can try to resolve stability-related problems or general file corruption by utilizing the SFC (System File Checker) and DISM (Deployment Image Servicing and Management) tools to see if Windows Update fails to run.
Run SFC Scan
- Launch an elevated Windows PowerShell terminal and run SFC Scan
- Enter the subsequent command:
/scannow sfc

- Hit Enter
Run DISM Scan
- Launch an elevated Windows PowerShell terminal and run DISM Scan
- Input the command below and hit Enter:
DISM /Cleanup-Image /CheckHealth /Online
- Execute the following two commands if the DISM tool finds any problems:
DISM /Cleanup-Image /Online /ScanHealth
DISM /Cleanup-Image /RestoreHealth /Online
Update Windows 10 Manually
The Microsoft Update Catalog website allows you to manually download and install the most recent updates for Windows 10 instead of utilizing Windows Update. That could assist in repairing the service for upcoming upgrades.
- To bring up the Run box, press Windows + R.
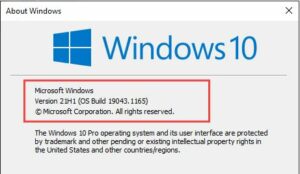
- Enter “winver” and press OK.
- Write the Windows 10 version, such as 21H1, down.
- Go to the Windows 10 update history website and take a note of your Windows 10 version’s most recent KB (Knowledge Base) ID.
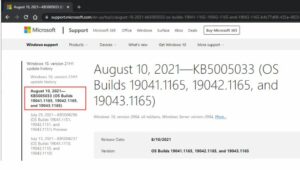
- Look up the KB ID on the Microsoft Update Catalog page.

- Choose the most recent Windows 10 update and download it.
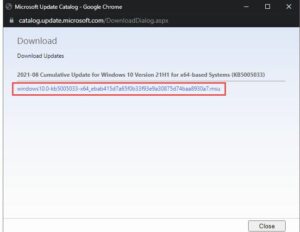
- Open the installer that you downloaded to start the upgrade.
Installing the most recent Servicing Stack Update for your Windows 10 version is an optional step. That may assist in resolving further Windows Update problems. You can use the Microsoft Update Catalog website to look for and download it.
Use the Windows Update Assistant
You can utilize the Windows Update Assistant to force-install the most recent Windows 10 feature update if the Windows Update service continues to malfunction.
Just launch the applet after downloading it to your computer, then choose Update Now.
Roll Back or Reset Windows
You may wish to do a system restore if you are still having issues. This aids in reverting any most recent OS modifications that gave rise to the problem. Another option is to attempt removing the prior Windows update.
As a last resort, returning Windows 10 to its original factory settings ought to resolve the Windows Update service permanently.