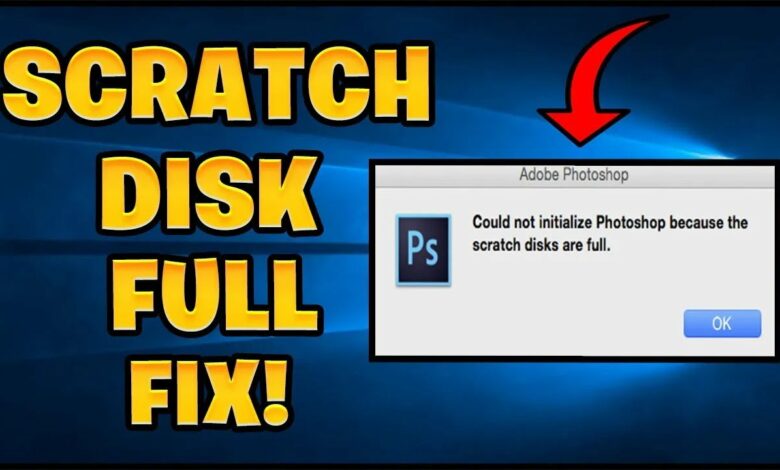
How To Fix Photoshop Scratch Disk Full Errors will be discussed in this article. A predefined section on your computer’s hard drive called a “scratch disk” is used by Adobe Photoshop to temporarily store data while you work on a picture. It serves as a virtual scratchpad that makes it possible for Photoshop to execute a variety of labor-intensive activities and access and handle massive files rapidly.
Photoshop sets its default scratch disk to be your computer’s primary hard drive. You can, however, assign a new drive or partition with additional capacity and modify the scratch disk options. Photoshop’s performance may be enhanced in this way, particularly while working on complex and resource-intensive tasks.
How To Fix Photoshop Scratch Disk Full Errors In 2024
In this article, you can know about How To Fix Photoshop Scratch Disk Full Errors here are the details below;
It is crucial to remember that the scratch drive should not be used in place of routine backups or as a permanent place to store files. Its goal is to improve Photoshop’s processing speed and efficiency by offering a makeshift workspace for image manipulation.
Photoshop checks the scratch drive space automatically when you launch it. You can get “scratch disk full” problems if there is not enough space available, which might slow down your workflow and restrict your ability to edit and save your work. Consequently, in order to guarantee a seamless and continuous editing experience, it is imperative to swiftly resolve any scratch disk-related issues.
Scratch disk consumption can be greatly increased by loading huge data, executing numerous programs at once, or applying intricate filters and effects. Therefore, any Photoshop user must be aware of the warning signals of a full scratch disk and understand how to manage it efficiently.
Signs of a Scratch Disk
There are a few clear indicators that your scratch disk is almost full and that you should take action. The following are typical indicators that your scratch disk is full:
- Slow Performance: A considerable decline in Photoshop’s performance is one of the most obvious indicators that the scratch disk is full. Insufficient scratch disk space could be the cause if you notice that the software takes longer to load, renders images slowly, or freezes regularly.
- Unable to Save: You can have trouble saving your work if your scratch disk is full. When there is not enough disk space, Photoshop may show error messages saying that it cannot finish the save process. This can be really annoying, particularly if you have taken a long time to alter an image.
- Error Messages: Photoshop may show error messages pertaining to scratch disk problems if your scratch disk is running low on space. The most common explanation for these error messages is because the scratch disk is full or cannot be accessed. These notifications should be taken seriously as they can offer important information about the condition of your scratch disk.
- Unusual Freezing or Crashing: Photoshop may freeze or crash without warning if there is not enough scratch disk space. It can indicate that your scratch disk is getting close to capacity if you frequently crash or freeze while working on your projects.
- Unable to Apply Filters or Effects: When Photoshop is full, it could be impossible for you to use filters, effects, or other resource-intensive functions. Make sure the scratch drive has enough capacity if you discover that Photoshop becomes unresponsive or gives unexpected results when using these actions.
Knowing these indicators will enable you to determine whether your scratch disk is getting close to capacity. When using Photoshop and you run into any of these problems, it’s necessary to designate a fresh scratch drive or make some space available.
How to Check or Change Scratch Disk Preferences
Photoshop makes it easy to check and modify the scratch disk preferences. To make sure your scratch disk is set up correctly, follow these steps:
- Open Photoshop and select the “Preferences” option. Click “Edit” on Windows, then choose “Preferences.” On a Mac, select “Preferences” from the menu bar after clicking “Photoshop.”
- From the sidebar of the Preferences window, choose “Scratch Disks.” The Scratch Disk preferences will open as a result.
- A list of available drives together with the amount of free space on each will be displayed. Photoshop is currently using the drive at the top as its scratch disk.
- Make sure there is adequate free space on the drive specified at the top in order to verify the scratch disk allocation. The scratch disk should ideally have between 40 and 50 GB of free space.
- By checking or unchecking the boxes next to the available disks, you can adjust the allocation if the present scratch disk is nearly full or does not have enough space. Photoshop will order the drives in ascending order of priority. Therefore, check the box next to the drive you wish to add as a scratch disk so that it shows up higher on the list.
- Uncheck the box next to the drive you want to stop using as a scratch disk. Make sure you have enough room on the remaining scratch disks, though.
- To save the modifications and close the Preferences box, click “OK.”
It’s crucial to remember that restarting Photoshop may be necessary after making changes to the scratch disk preferences. Furthermore, any files that were kept on a drive that you remove from the list of scratch disks will no longer be available as part of the scratch disk.
You may make sure Photoshop has enough space to function at its best and prevent “scratch disk full” issues by routinely checking and modifying the scratch disk options.
How to Clear Temporary Files to Free up Space on the Scratch Disk
Eliminating Photoshop’s temporary files is one technique to free up precious storage when your scratch disk is getting low on space. Over time, these temporary files build up and can use a large amount of disk space. This is how these files can be cleared:
- After starting Photoshop, select the “Edit” or “Photoshop” menus on Windows or Mac. Select “Purge” from the dropdown menu, then pick the particular temporary files you wish to remove.
- “Undo,” “Clipboard,” “Histories,” “All,” and other like categories can be among the available choices. Based on the temporary files you wish to delete, choose the relevant option. For instance, choosing “All” will remove all temporary files, but choosing “Histories” will just remove the states related to the past.
- To start the cleansing procedure, click “OK.” This operation could take several seconds to several minutes, depending on the quantity and size of temporary files.
- Once the procedure is finished, Photoshop will delete the chosen temporary files to clear up space on the scratch disk.
- You can also use keyboard shortcut to remove all temporary files at once. To launch Photoshop, use “Ctrl+Alt+Shift” on Windows or “Cmd+Option+Shift” on Mac. You’ll be prompted with a dialog box to decide whether to remove the Photoshop settings file. Verify the removal in order to remove any temporary files.
- It is important to consistently remove temporary files from your scratch disk to avoid them building up and taking up too much space. By doing this, you may keep your system operating at peak efficiency and prevent “scratch disk full” issues.
It is crucial to remember that deleting temporary files will erase them from your computer forever. Thus, before starting the cleansing process, be sure to backup any crucial files or projects.
A quick and easy way to clear up space on the scratch disk and give Photoshop enough area to function properly is to clear up any temporary files.
How to Add More Space to the Scratch Disk
To accommodate your Photoshop projects, you might need to acquire more storage if you notice that your scratch drive is always running out of room. The following are some methods to make more room on your scratch disk:
- Upgrade your SSD or hard drive: If you have a computer, you might want to think about getting a bigger solid-state drive (SSD) or hard drive. This will free up additional space on your computer for other programs and data in addition to your scratch disk.
- External hard drive: You use external hard drive as your new scratch disk by connecting it to your computer if you don’t want to upgrade your internal storage. For best results, make sure the external drive has enough room and a quick connecting port (such USB 3.0 or Thunderbolt).
- Partition your hard drive: To make room for the scratch disk, you might want to resize one of the partitions if your huge hard drive has several partitions. When partitioning your drive, proceed with caution as it can impact current data.
- Make room on the current scratch disk: Check the existing scratch drive to see whether any files or apps are consuming up space before adding more storage. To create space only for the scratch drive, remove any unnecessary files or move them somewhere else.
- Utilize online storage: You can save some of your Photoshop files & the projects in the cloud if you have dependable, quick internet access. Storage options from services like Dropbox, Google Drive, or Adobe Creative Cloud might help relieve the pressure on your local scratch drive.
Make sure you format the additional storage correctly and designate it as the primary scratch drive in Photoshop’s options when you add more space to your scratch disk. For instructions on modifying the scratch disk settings, see the section on “How to Check or Change Scratch Disk Preferences.” Also check Pipedrive Alternative
Increasing the scratch disk’s storage capacity can free up more space on your computer so you can work with larger files and make intricate Photoshop modifications without worrying about running out of room.
How to Move the Scratch Disk to a Different Drive
You can relocate the scratch disk to a new drive if the one you have is getting too small or if you wish to use a different drive for better performance. Here’s how to go about it:
- Open Photoshop and select the “Preferences” option. Click “Edit” on Windows, then choose “Preferences.” On a Mac, select “Preferences” from the menu bar after clicking “Photoshop.”
- From the sidebar of the Preferences window, choose “Scratch Disks.” The Scratch Disk preferences will open as a result.
- To designate a drive as the new scratch disk, select it. For best results, select an external or internal disk with enough capacity and a quick connection interface, such as Thunderbolt or USB 3.0. Verify that your computer has detected and connected the drive.
- Click on the “OK” button & the save changes and dismiss the Preferences window.
- Photoshop will ask you to restart the program and confirm the modification. Select “Yes” to continue.
- The new drive will be assigned as the scratch disk when Photoshop restarts, and any upcoming temporary files will be kept there.
- Return to the Scratch Disk options and uncheck the box next to the drive you wish to stop using as a scratch disk if you wish to delete the previous one.
It’s vital to remember that if the new drive has slower read and the write speeds than the old one, relocating the scratch disk to it could make Photoshop run slower. Thus, to retain optimal performance, think about switching to a drive with similar or superior performance.
You can increase the overall effectiveness of your picture editing process and guarantee that Photoshop has enough capacity for its temporary files by relocating the scratch disk to a separate device.
What to do if Photoshop is still Showing Scratch Disk Full Errors
In the event that the above procedures do not resolve the “scratch disk full” issues in Photoshop, there are a few more things you can do to fix the problem:
- Make extra room on the scratch disk by going over it and removing any files or programs that aren’t really needed in order to make more room. To get rid of temporary files, you can also use Photoshop’s “Purge” option in the options.
- Boost virtual memory (Windows): You can attempt to boost the virtual memory allocation if you are running Windows. Navigate to the Control Panel, choose “System,” then “Advanced System Settings.” Next, click on “Settings” under the “Performance” area. Navigate to the “Advanced” tab Performance Options box, then select “Change” under Virtual Memory. To boost performance, change the virtual memory settings and add extra RAM.
- Enhance the functionality of Photoshop: Go to the Performance tab in Photoshop’s options and confirm that, if it is available, the “Enable GPU acceleration” option is chosen. Additionally, you can change the memory use settings so that Photoshop has access to additional RAM, which would lessen the need for the scratch disk.
- Upgrade your system: If the hardware on your computer is out-of-date or doesn’t have enough power, you should think about upgrading. Increased RAM, an SSD for your hard drive, or even a more potent computer can help Photoshop function better and get over the constraints of the scratch disk.
- Reset Photoshop preferences: Photoshop preferences can sometimes be reset to fix enduring scratch disk problems. To activate Photoshop, hold down the Shift + Alt + Ctrl (Windows) or the Shift + Option + Command (Mac) keys. You’ll be prompted with a dialog box to decide whether to remove the preferences file. After you confirm the deletion, Photoshop will open with its default settings.
- Seek out expert assistance: Try using the Adobe help forums or getting in touch with a qualified specialist who specializes in Photoshop-related problems if you have followed all the preceding instructions and the error “scratch disk full” persists.
The goal of each of these procedures is to fix the “scratch disk full” issues. It’s critical to approach troubleshooting methodically, working your way up to more complex solutions as needed and beginning with the most basic ones.
In order to prevent these errors from occurring again, don’t forget to periodically check the amount of space on your scratch drive and make the most use of it.