Ways To Fix Windows 11 Troubleshooter Not Working will be described in this post. It’s no secret that Windows 11 occasionally encounters issues. Fortunately, Microsoft offers you a variety of troubleshooters that can assist you in resolving the majority of those frequent problems. What transpires, though, if the Windows Troubleshooter software itself experiences a malfunction or error? This writing contains some guidance that will help you resolve the Windows 11 Troubleshooter not working error if you have personally had a similar problem. So let’s start.
Top 7 Methods To Fix Windows 11 Troubleshooter Not Working
In this article, you can know about Ways To Fix Windows 11 Troubleshooter Not Working here are the details below;
1. Check Path for Temp Folder
Windows needs to generate and store temporary files in the Temp folder each time you run a troubleshooter. However, the troubleshooter won’t function properly if Windows is unable to find this folder on your computer. Check to see if the configured path for the Temp folder is accurate to override this.
- To access Windows Search, press Windows key + S. Type Edit the system environment variables into the search field and hit Enter.
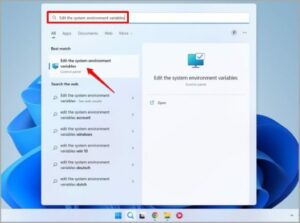
2. On Windows 11, change the system environment variable
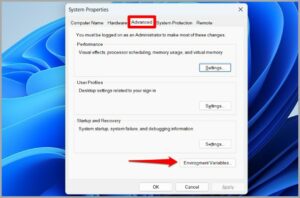
- Verify the folder paths for TEMP and TMP under System variables. The appropriate setting is C:WINDOWSTEMP.
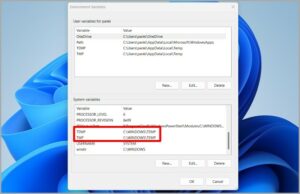
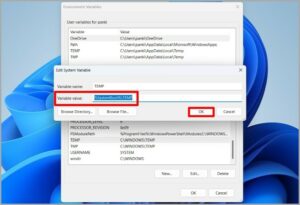
If the path is set to anything different, double-click on TEMP and, before choosing OK, modify the Variable value to %SystemRoot%TEMP. Do the same for the TMP folder.
After doing this, restart your Windows computer and try running the troubleshooter to see if it resolves the issue.
2. Restart Cryptographic Service
For the troubleshooter to function, a little program called Cryptographic Service must be running in the background. The actions listed below must be followed in order to restart the service if it has encountered a problem.
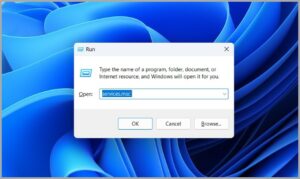
- To open the Run dialogue box, shove the Windows key + R. Enter after typing services.msc into the box.
- Locate Cryptographic Services by scrolling down.
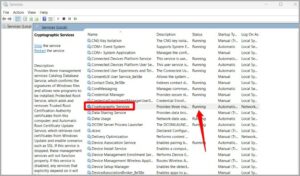
3. Restart the service by performing a right-click on it if it is already running. If it isn’t already operating, choose Start.
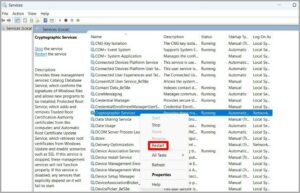
Verify that the troubleshooter is now functioning properly.
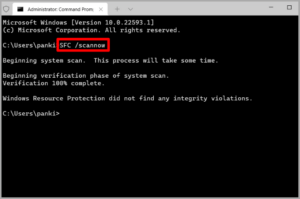
3. Run SFC and DISM Scan
Troubleshooters in Windows might potentially be affected by problems with the system files on your computer. That example, the Windows troubleshooter might not function as intended if some important system files are corrupted or missing. Running an SFC scan tracked by a DISM scan will quickly cure this. Find out how by reading on.
- From the list that appears when you right-click the Start button, choose Terminal (Admin).
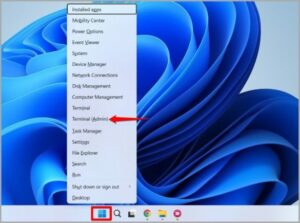
2.When the User Account Control screen displays, select Yes.
3. Enter the command by typing it and hitting Enter.
4. Run each of the ensuing instructions one at a time after completing the SFC scan.
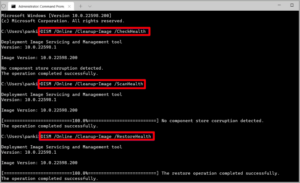
After executing the aforementioned commands, verify that the Windows troubleshooter is operating properly.
4. Run Disk Cleanup
On occasion, outdated temporary files on your computer can obstruct Windows troubleshooter’s functionality. You may easily get rid of such temporary files with the aid of the practical software Disk Cleanup. Don’t worry, deleting these files won’t have any impact on your apps or data.
The instructions listed below can be used to launch the disk cleanup program on Windows.
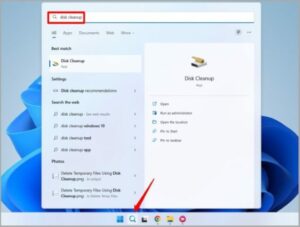
- Click the Search button, enter disk cleanup, and then click OK.
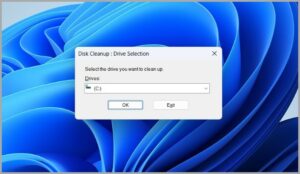
- Choose the C: drive from the drop-down option.
- Mark each checkbox next to the files you want to delete, then click OK.

Once the troubleshooter has been run, try it again to see if everything is in order.
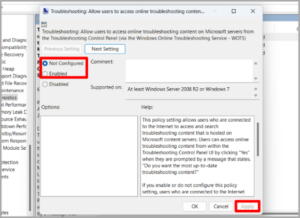
5. Check Group Policy
Another reason why troubleshooters could not function properly on Windows is if Group Policy has disabled them. If so, you can take the actions listed below to make sure that everyone has permission to execute troubleshooters on your PC. For this to function, you must be logged in as an administrator.
Note that only the Windows Pro, Enterprise, and Education editions come with Group Policy Editor.
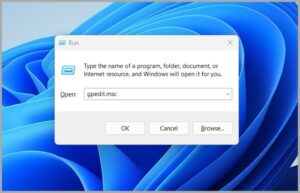
- To start the Run conference box, press Windows key + R. Type gpedit.msc into the window and hit Enter.
2. Navigate to Computer Arrangement > Administrative Templates > System > Troubleshooting and Diagnostics > Scripted Diagnostics in the Group Policy window using the left pane.
Verify that the Enabled or Not configured status is selected for each of the three entries on your right.
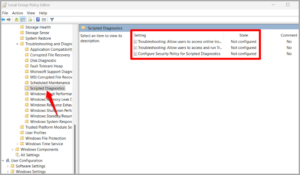
3. You can double-click on any entry that is currently set to Disabled to make the adjustment to Enabled or Not configured. Next, press Apply to save your changes.
After that, restart your computer and attempt to run the troubleshooter once more.
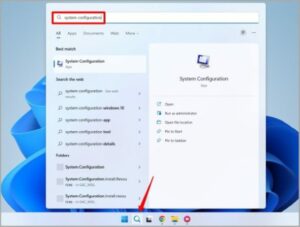
6. Run Troubleshooter in Clean Boot State
Your computer’s operating third-party programs and services may also obstruct Windows operations. When that occurs, Windows may encounter issues or be unable to do specific tasks. You can try starting your computer in a clean boot state to confirm this. How? Read on.
- Click the Search button, enter system configuration, and then click OK.
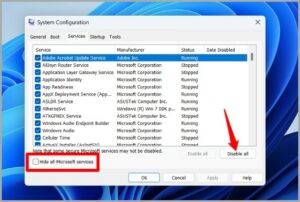
- Click the Services tab, then check the box next to Hide all Microsoft services. After that, select the Disable All button.
3. Open Task Manager may be found by clicking the Startup tab.
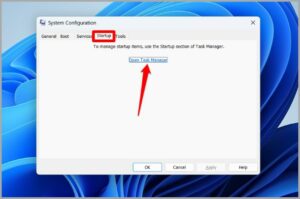
4. Windows 11 Task Manager should be opened. Choose a third-party application, then click Disable at the top. To disable all third-party apps and programs, repeat this procedure.
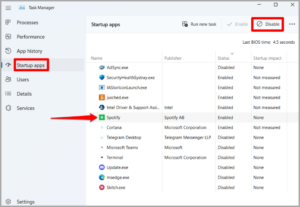
To enter the clean boot state, restart your computer. Then try running the troubleshooter once more. If it functions, you can be certain that a third-party software or service is to blame for the problem. To see if it helps, you might try uninstalling any recently installed applications or programs.
7. Perform system Restore
You have no choice but to do a system restore if uninstalling recently used apps or programs doesn’t help. This will enable you to roll back any recent changes you’ve made to your PC and return it to how it was before the issue started.
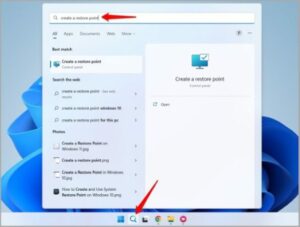
- From the Taskbar, click the search icon, type “create a restore point,” and then hit Enter.
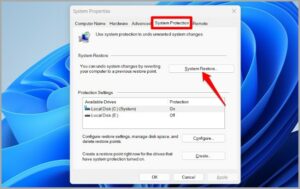
2. Select the System Restore button under System Protection.
- If you choose the second option, you may either choose the suggested restoration point or pick one on your own. Click Next after making your choice.
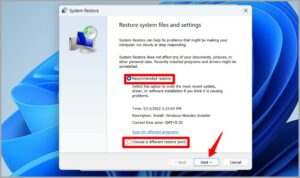
- Finally, select Finish.
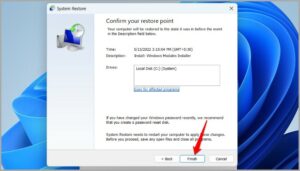
Your computer will restart and return to its initial settings. The root problem should be resolved as a result, allowing troubleshooters to resume their work.
No More Trouble
When a utility that is supposed to help you fix issues stops functioning, it’s simple to become puzzled. Implementing the troubleshooting advice should have helped you resolve Windows 11 troubleshooters and soothe your anxiety.